Many homeowners rarely give their water heaters much thought, but when they stop working properly, the impact on household chores can be noticeable. Thankfully, most problems are easy to troubleshoot and repair. For professional help, contact Denver Water Heater Repair.
First, check the power supply. A faulty heating element on an electric water heater or a blown fuse for gas models may prevent the appliance from operating.
1. Element
Having a hot shower after a long day is one of the greatest pleasures life has to offer. Unfortunately, if you’re only getting cold water from your shower and other faucets in your home, it may mean the element in your water heater is burned out. Luckily, you can replace the element yourself in just a few simple steps. Performing some repairs can save you money and sharpen your DIY skills, but be sure to leave larger jobs like this to the experts.
You’ll need to take off the access panel and peel back insulation in order to reach the heating elements. After loosening the two terminal screws and disconnecting the electrical wires, you can use a multimeter to check for continuity and resistance. A reading of zero or a needle that doesn’t move indicates the element is burned out and needs to be replaced.
If you don’t have a multimeter or would rather not risk damaging your unit, call in a professional to test the elements for you. A visual inspection is also helpful. Look for signs of corrosion or other damage that could be indicating their failure. However, many problems aren’t visible to the naked eye. Using a multimeter to test the elements for continuity and resistance is a good way to determine whether or not they’re working properly.
After you’ve successfully tested the heating elements, it’s time to install the new ones. First, make sure that the power to your water heater is off. It should have its own dedicated circuit breaker, which is often located just above the high-temperature cutoff switch on the upper part of the tank. If you’ve recently tripped these breakers, pressing the reset button on both of them will likely fix the problem. However, if they continue to trip regularly, you’ll need to replace the elements. Once you’ve reassembled everything, restore power to your water heater at the breaker box. Upon restarting, allow time for the water to heat up and check for any leaks around the new element.
2. Thermostat
If your water heater isn’t producing hot water or the temperature of the water isn’t as high as you like, one of two things may be wrong. Either the heating element has failed or the thermostat has stopped working. If the former, the water heater should be replaced and that is a job for a professional plumber. However, if the latter is more likely the problem, it’s a much simpler fix and you can do it yourself.
First, turn off the power to the water heater by turning off the switch or removing the fuse. You’ll want to shut off the gas supply as well. Draining the water heater isn’t a bad idea to remove sediment that has built up over time.
Next, you need to remove the upper and lower access panels. Use a flathead screwdriver to do so and be careful not to burn yourself. There should be insulation over the panels that you’ll need to fold away and tape down. After you remove the panels, you’ll need to disconnect the power wires and isolate each thermostat. Then you’ll need to use your multimeter to test both the thermostats and the elements for continuity – that is, whether they have a continuous electrical path.
The upper thermostat is a little more complicated. After turning the screw on the upper thermostat to its highest setting, you’ll need to set your multimeter to RX1. Place one meter lead on the bottom left terminal and the other on the top right terminal (screw #5). You should get a reading of 1 if the thermostat is working.
The lower thermostat is a lot easier to test. Put one meter lead on the reset terminal and the other on the left side terminal, which should have power wires. If your multimeter reads 1, then the thermostat is defective and needs to be replaced. If it reads 0, the thermostat is functioning normally. Be sure to buy a new thermostat of the same type and model as your old one. After testing, reconnect the wires and reinstall the upper and lower access panels as well as any insulation.
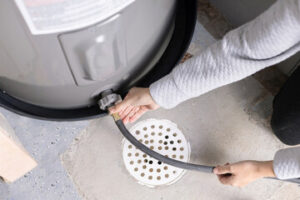
3. Dip Tube
In water heaters, the dip tube is a critical component that keeps your hot water running. When it fails, your supply can become inconsistent and lukewarm at best.
Constant exposure to various temperatures and acidity levels erodes plastic and shortens the lifespan of your dip tube. Minerals can also creep in and impact the functioning of the dip tube. When this happens, you may notice small, white particles floating in your hot water. At first, they might look like dust or soap residue, but they’re actually pieces of broken dip tube.
When your dip tube is faulty, it fails to push new water down to the bottom of the tank and instead allows cold water to mingle with the hot water and cool down. This impacts the temperature of your water and can cause lukewarm showers and washing machines.
The good news is that replacing a dip tube isn’t hard to do. While you can replace it yourself, we recommend hiring a professional to ensure the job is done right. A licensed plumber can safely remove the old one, install a replacement, and reattach the cold water supply line. They can then refill the tank, test it for functionality, and finally restore power to the water heater.
A faulty dip tube is the most common reason for an inconsistent hot water supply. It can lead to lukewarm showers and dishes, and even affect the temperature of your home.
Replacing a dip tube isn’t a difficult task, but it’s important to take precautionary measures before you start working on your water heater. First, shut off the circuit breaker that delivers power to your water heater. Then, drain the tank to get rid of any plastic flecks that might have been left behind by the broken dip tube. Next, disconnect the cold water inlet valve by using a wrench or pipe wrench to loosen the short piece of pipe threaded on both ends. Lastly, use a flat screwdriver to pull out the short piece of tube that’s connected to the inlet port nipple.
4. Pressure Valve
The pressure relief valve is an essential safety feature of any water heater. It is designed to relieve a predetermined amount of excess pressure that may build up inside the tank or in the system plumbing. The pressure relief valve can be found in the basement, garage or downstream of your home’s water meter. It is important that you know where your pressure relief valve is located in your home. It is also a good idea to have it checked periodically. If you are unsure where yours is located, check your home inspection report or ask your local plumber.
A faulty pressure relief valve can cause damage to the hot water heater. If the valve is not properly anchored, it can loosen and leak. If this occurs, you should replace the valve and reattach it to the water heater.
In addition, if you hear sounds like a low rumble or high-pitched whine coming from the water heater, it could mean that the anode rod is wearing out and needs to be replaced. The anode rod is a metal rod that is placed in the center of the water heater. It corrodes more easily than the steel tank, so it helps to protect the tank from rust and corrosion.
If you hear a loud popping or whining noise, it could mean that the gas water heater is leaking. This is a dangerous situation and should be corrected immediately. Make sure you turn off the power to your water heater and shut off the gas. You should then drain the water heater.
Some basic water heater repairs can be done by a homeowner, such as replacing the heating element or thermostat, flushing the tank to remove sediment buildup and inspecting and replacing the anode rod. However, if you have a gas water heater, it is best to have all work done by a licensed technician. Working on a gas water heater involves a high level of skill and is not a do-it-yourself project. In order to do this type of work, a plumber must be familiar with 240-volt electrical circuits, gas piping and water piping.