Types of Roofers

Roofers Corpus Christi are experts in roof repair, installation, and maintenance. They work with a team to ensure top-quality service and have the tools and tech to get the job done right.

Residential roofers repair and install roofing materials, including shingles, single-ply, bitumen, and metal. They also inspect and repair existing roofing materials.

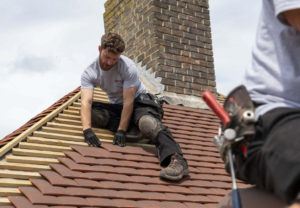
Residential roofers work on single- and multi-family homes, including apartment complexes. Their job involves navigating through residential neighborhoods, working on rooftops with ladders or scaffolding, and communicating with homeowners. This type of roofing typically includes new roof installations and repairs, inspections for real estate companies, insurance claims and shingle replacements. Residential roofers may also install skylights and solar panels. If a residential roofer is in retail sales, they will usually have a customer service department to handle any issues that arise. They also offer a range of options, including zero-interest financing. These roofers typically give a long, two- to four-hour sales presentation before starting the project.

Commercial

Commercial roofers work on larger buildings, typically with more complex roof structures. They have experience with many different kinds of flat roofing materials, including EPDM, PVC and TPO. These roofs tend to be higher than residential ones, so it’s important for a commercial roofer to have excellent physical condition and be comfortable working at heights.

Commercial clients often have a specific idea of what kind of roof they want before asking for quotes. They may work with engineering firms or roofing consultants to decide on a roofing material, and they may specify certain specifications for their roofs, such as a type of warranty.

Because of these specialized needs, it’s important for a commercial roofer’s point of contact to be able to communicate effectively with all stakeholders on a project. Skujins tries to avoid projects where there are multiple points of contact and instead works directly with the engineer or project manager on his roofing jobs. He believes this makes the process smoother and more efficient for everyone involved. He also asks prospective customers for references from previous jobs so he can learn more about the customer’s expectations before bidding on a job.

Industrial

Industrial roofs require more robust roofing materials and designs due to the heavy loads placed on them from industrial processes. Industrial roofers install, repair, and maintain these types of roofs. They often work with a variety of roofing materials, including metal panels and single-ply membranes, depending on the specific requirements of the building in which they are working.

Roofers who work on industrial buildings also inspect the structures to identify and address any issues that may arise. They use specialized equipment and techniques to assess the integrity of the roof structure, detect leaks or moisture intrusion, and identify areas in need of repair or maintenance.

Roofing contractors must follow strict safety guidelines when working on rooftops, and many states regulate the roofing trade through licensing requirements. Workers who fall from the roof of a building are at risk for severe injuries, and they must use ladder safety devices, harnesses, and other tools to prevent falls.

The median annual wage for roofers is $50,030. The occupation is projected to grow 6 percent from 2023 to 2033, faster than the average for all occupations. This growth is attributed to the need for replacement and repair of existing roofing systems, as well as new construction.

Roof Structure

While the roof of a house may look like an insignificant covering that protects the inside from precipitation, there is far more to it than meets the eye. It has an internal structure, often called a truss, that creates a skeleton for the rest of the roof to build on top of. A few different types of trusses are used in the framing of a roof, and the type will determine the ability to add a loft or attic space later on, as well as ceiling height options for rooms inside.

The most common and familiar kind of roof structure is a gable roof, which has two planes of sloping walls that meet at a peak in the center, called a ridge. There is a gap where the rafters meet at the ridge, and this is covered with ridge tiles to help prevent rainwater from getting in through that space.

A more complicated roof structure is a lattice truss, which has wood strips on the outer side of the joists to hold up the shingles or tiles. A lattice roof can also have skylights to allow natural light into rooms below.

Another option for a roof is a rafter-beam truss, which has rafters based on the walls and a central joist, called the collar beam, to support them. This joist can be set higher than the joists around it, which can give a vaulted or tray ceiling appearance in certain rooms.

Other parts of a roof include drip edges, flashing and sheathing. Sheathing is a layer of material placed over the joists to provide additional insulation, as well as fire resistance and water protection.

Roof Deck

Just as the foundation is your home’s structural backbone, your roof deck (also known as sheathing) provides a solid base for the rest of your roof. The flat, sturdy sheets go over the rafters and joists of your roof framing, and from there, roofers secure all the other components that protect your home from the weather (like leak barriers and shingles).

Traditionally, roof sheathing was made from planks of wood, but today, most new homes are built with sheet sheathing. This is made from a flat, rectangular material that can be either plywood or OSB, and it comes in varying thicknesses, depending on the span of your rafters.

When constructing a new home, we typically use sheathing made from structural panels like plywood or OSB, because they help to transfer lateral loads from the roof plane to the walls of your house. We also offer sheathing made from solid wood tongue and groove boards if you’re building a custom home or have a preference for an exposed ceiling, but these don’t provide the same level of lateral load stability as panel sheathing.

If your home has old plank decking, it might be time to replace it. Water stains on interior walls or rafters, a drooping roofline, or curling or buckling shingles are all telltale signs that you need to have your decking replaced, and the sooner the better to stave off further damage. If you’re building a new house or doing a reroofing project, we recommend choosing either 3/8″ CDX plywood or 7/16″ OSB for your sheathing. Both are strong, durable, and cost-effective. They also meet code requirements for moisture protection.

Underlayment

A layer of underlayment protects the wood boards that make up your roof deck. This is important, since water can infiltrate a home’s structural wood, which leads to rot, mildew, mold and other problems. It also helps to prevent moisture from becoming trapped under shingles, which can lead to the formation of ice dams and a host of other issues.

Typically made from either asphalt-saturated felt or synthetic materials, roof underlayment acts as an extra barrier to prevent water that rises during a rainstorm from infiltrating the roof structure and into your home. In addition, it provides an additional insulation layer and reduces condensation that can contribute to roof damage, poor energy efficiency and even health issues for occupants.

While a variety of underlayment options exist, traditional felt underlayment is still common and meets most building code requirements. It is generally available in 15- and 30-pound thicknesses for different types of roofing pitches. Felt can be fastened using staples or nails, though in high-wind areas and with synthetic underlayment, plastic caps are often used because they offer better wind resistance and help to prevent leakage through holes created by the fasteners.

Synthetic underlayment is more resistant to fungal growth, less likely to wrinkle and has superior water resistance than felt. It’s lightweight and easier for workers to work with, reducing physical strain on them and allowing the installers to get a job done faster. It’s available in a wide range of colors to match or complement the color of your roof shingles, and it’s often used under premium designer, architectural and performance shingles.

If you live in a cold climate, it’s recommended that an ice barrier underlayment be installed. This is a self-adhering, waterproof underlayment that helps to limit the flow of melt-water back up under shingles, which could cause ice dams and other water damage.

Mold Removal – What You Need to Know

A trained Mold Removal In Brooklyn specialist will come to your home and determine what steps are needed to remove the mold. Before they arrive make sure to document the contamination as best you can.

Mold Removal

Standard household bleach is able to kill mold on non-porous surfaces, but it cannot penetrate into materials like wood or drywall. Vinegar, on the other hand, can.

Some homeowners and contractors believe that mold removal must involve killing the mold first, as if it were some sort of germ or bacteria that needed to be “snuffed out” before it got out of hand. The truth is that successful mold remediation does not involve fogging or spraying any EPA-registered biocide to kill the mold; it involves finding the source of the mold and eliminating it by fixing the moisture problem that caused it to appear in the first place.

The mold remediation process typically starts with a thorough inspection of the area to determine the extent of the contamination. Then the workers suit up in head-to-toe white suits, boots and respirators (except in crawl spaces where a double tent may be set up). They then enter the contaminated area and apply a thick liquid called a biocide that is approved by the EPA to kill mold spores. This usually takes several hours to set and must be allowed to dry completely before the space can be used again.

While the biocide is working, the mold remediation crew focuses on cleaning and wiping surfaces. They also use HEPA vacuums to remove any lingering mold debris and spores. They may also clean and disinfect personal items such as carpet and clothing that have been contaminated.

After the mold is killed the team moves on to the cleanup phase which includes removing and disposing of all contaminated materials, including porous building materials such as drywall. They may also need to replace items such as carpeting and insulation if they have been severely damaged by the infestation. Then they must clean and dry the affected areas thoroughly using fans or dehumidifiers.

Mold can produce mycotoxins that are harmful to humans. These mycotoxins can be especially toxic for children, seniors and people with weakened immune systems. While there is no evidence that the mycotoxins in most molds are dangerous to healthy adults, it is always best to be safe than sorry.

Many mold remediation companies now offer a less-toxic alternative to biocides that still kills the mold but does not contain chlorine bleach. There are also a number of natural cleaning products on the market that are designed specifically to remove mold. These products are usually based on thyme oil and should be used according to the instructions on the label.

Removal

Mold is a type of fungus that thrives in humid environments. It grows from tiny spores that float in the air and land on moist surfaces, where they grow into colonies. Some types of mold are harmless, while others can trigger health problems and damage property. Mold growth can be difficult to notice, especially if it is hidden in crawl spaces or behind walls.

Mold removal involves the physical removal of mold spores from a surface. It is a common method used for small areas of visible mold, and it can be effective in reducing the symptoms of mold exposure. It does not address the underlying cause of the mold growth, however, so it is often combined with remediation to prevent future infestations.

Remediation is a more comprehensive process that includes containment, cleaning, and prevention. It is typically recommended when a homeowner has serious or extensive mold contamination, and it can be used in conjunction with other methods of mold removal to reduce the risk of further mold outbreaks.

Before beginning any work, a mold remediation professional will isolate the area to keep the spread of mold spores from contaminating other parts of the home. They will use plastic sheeting and other materials to seal off the affected space, and they may also use negative air ventilation systems to remove dirty indoor air and replace it with fresh outdoor air.

Once the area has been isolated, professionals will begin removing any damaged building materials. This could include drywall, carpeting, and insulation. They will carefully bag the materials and dispose of them according to EPA standards. The team will then clean and disinfect the remaining surfaces of the home to remove any lingering mold spores. They will spray a special biocide that is approved by the EPA to kill any remaining spores.

Finally, they will apply a mold resistant coating encapsulating product to the entire home to stop new mold growth and prevent future infestations. After completing the remediation, they will test the air quality of the home to make sure it is safe for homeowners to return.

Disposal

Mold spores can be dangerous when inhaled or ingested, so if you suspect that your home is affected by a mold problem, it’s best to leave the removal and disposal of the material to professionals. This process will ensure that the mold spores don’t spread to other parts of the house and prevent further infestation. It’s also essential to take steps to ensure that the mold doesn’t return once it has been removed, which is why a comprehensive mold remediation strategy should be implemented, including containment, cleaning, and prevention.

The first step in the remediation process is to spray an EPA-approved biocide on the affected area, which will make the mold spores sterile and stop them from spreading. Non-porous items like bathtubs, countertops, and metals can usually be cleaned and sanitized without further issue, but porous materials such as carpeting and fabric-covered furniture must be discarded. These materials should be placed in thick plastic bags and double-bagged before being disposed of, with the outsides of the bag being wiped down to remove any hidden spores that may still be present.

During this phase, the professionals will also inspect the area for signs of moisture damage or leaks that could be contributing to the mold growth. This is because mold spores are spread by water and can attach to surfaces and sprout new growth, so it’s important to find out what’s behind the contamination before you attempt to remove it.

This is why it’s essential to use a professional service that understands and follows the relevant laws regarding contaminated waste. This will ensure that the disposal process is safe and that any hazardous chemicals don’t leach into the surrounding environment and cause additional problems.

Once the biocide has been sprayed, the professionals will begin the removal process by carefully disposing of any affected building materials. This includes drywall, insulation, and carpeting. This can be an expensive and time-consuming process, but it’s vital to protect your health and the integrity of your home. After removing the contaminated material, the professionals will disinfect and wipe down any remaining surfaces with disposable materials to make sure that the spores are completely eliminated.

Cleaning

Mold is a type of fungus that thrives in areas with high moisture. It can grow in bathrooms, kitchens, basements and sink cabinets where condensation is common. It can be black, white, green, purple or orange and range from small, penny-sized spots to taking up entire walls. Whether it’s a minor outbreak or a major contamination, there are multiple ways to clean up the mess.

Mold needs to be scrubbed, sanitized and deodorized to kill it. A common technique is to mix a teaspoon of soap and two cups of water in a spray bottle. Apply this mixture to the affected area and scrub it with a stiff brush. Then, rinse the surface and wipe it down with a paper towel, making sure to soak up the excess water. You can also use borax to kill the mold roots. It works by soaking into the wood and killing it.

Another way to clean is by sanding the mold off of the wall or surface. This can be very effective, but it’s best done with a respirator and gloves to protect against the dust particles that will be stirred up. It’s also important to keep the work area as dry as possible during this process. This can be difficult in an area that has been extensively contaminated by a large amount of mold.

A professional restoration company can use a variety of methods to clean up the mold and sanitize the work area. Some of these include:

Typically, near the beginning of a remediation project, a contents pack out will occur. This is when a restoration company removes any saveable contents such as textiles, clothes, hard goods, photos and electronics that are affected by mold. These items are taken off site to be cleaned and restored. This can help to reduce the amount of spores that are spread throughout the property and can prevent further contamination in areas where the contaminant has not yet reached. If the contents cannot be saved, they are disposed of in 6 mil plastic bags, double-bagged and tied shut to avoid releasing spores into the air.

Navigation